Last year I gave a little tour of my classroom at the start of the school year. But a lot has changed over the summer, so here we are again for Round Two. If you follow me on Instagram, you've already gotten a sneak peek.
First, let's take a quick 360 degree look at the classroom:


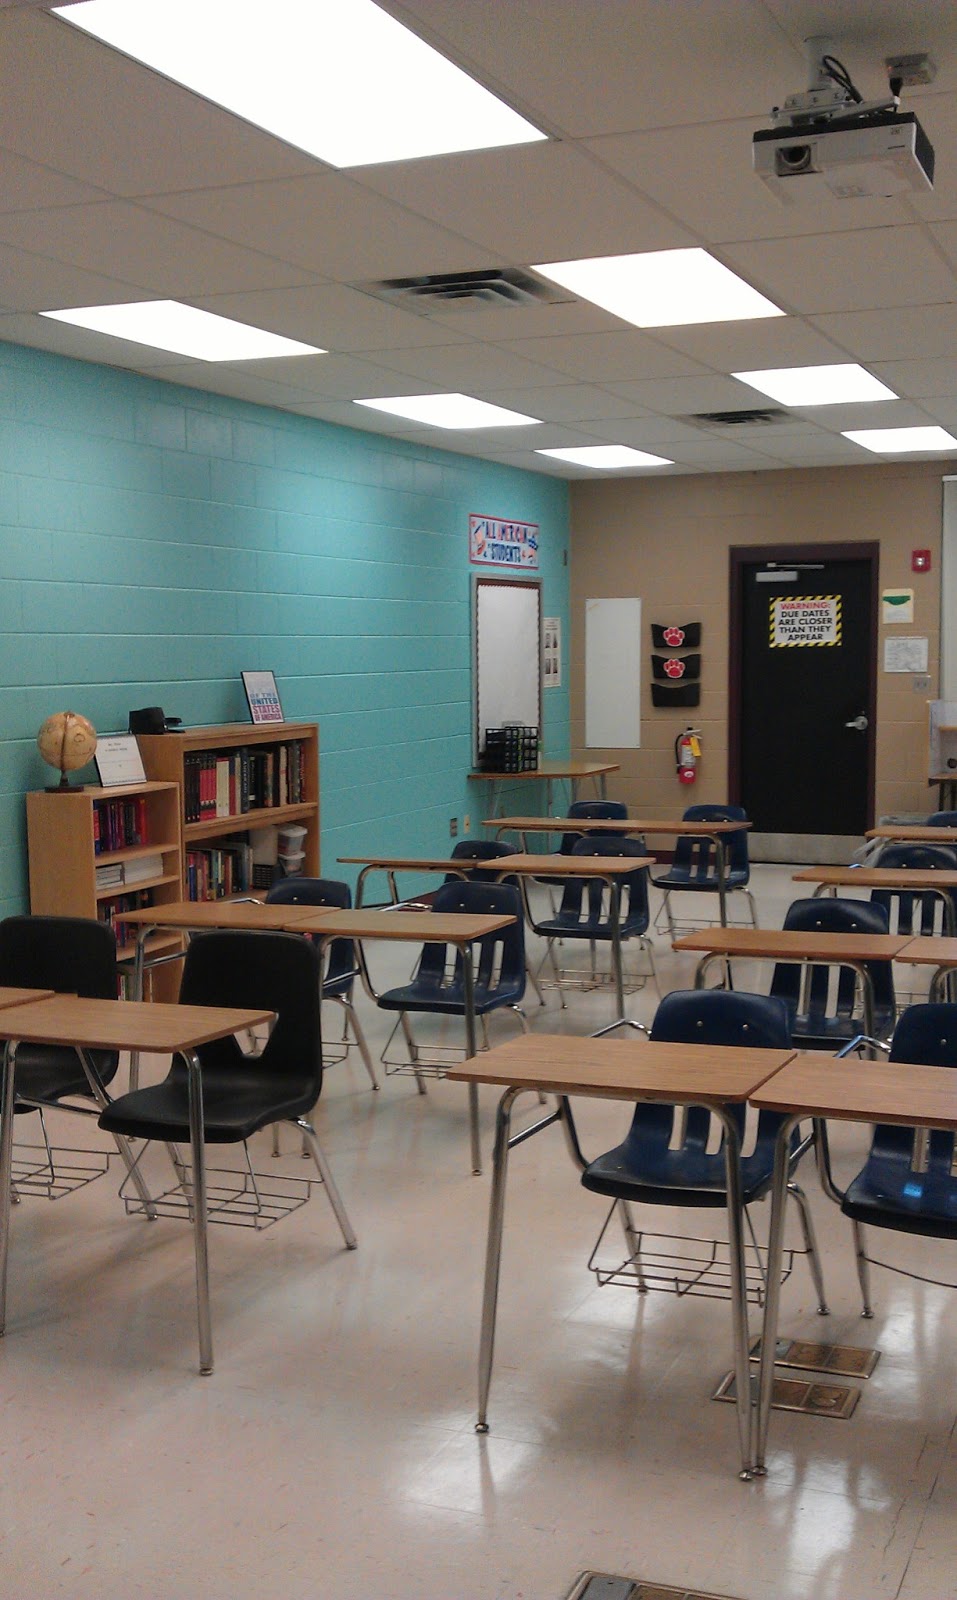
The first major change that you'll notice is the fact that the walls are painted! I've been dreaming of painting the walls since last summer. I even had some of my students brainstorm colors and ideas with me at the end of last year. Originally, the plan was to go with a red, white, & navy blue scheme to tie into the fact that all I teach is US History. The walls were going to be navy and there was going to be a red timeline around the top with white lettering. My students were so excited, some of them even offered to come in and help me paint over the summer.
The problem? I didn't realize how expensive paint was! And considering I had over 700 square feet to paint, and it was going to need at least two coats, I was looking at over $120 in paint alone. No way was I going to pay that much for paint. As I started walking out of the paint department with my painting hopes shattered, I saw the collection of whoopsie paint.

To my surprise, there were two gallons of the exact same color marked down from $35 to $5 a gallon! Plus, there were two quarts of tan marked down from $11 to $2.50 each. We talked to the guy at the paint counter and asked him if he thought this paint would cover all the walls. Gave him the square footage. Described the walls and what condition they were in. He said it'd be close. Since it was paint+primer, he said the coverage would be good. Probably only need one coat. But, he recommended using a primer and going over the scuff marks and any other imperfections along the walls.
Luckily, the blue paint (which looks most like the image on the right) was a stock color called Bay Mist by Valspar, so if we ran out, it wouldn't be that hard to color match it later. And the tan color was only going to go on one wall, so we figured half a gallon was plenty.
The Hubby and I headed over to the school the next day and started prepping the walls. We taped off everything and primed over what needed to be primed. We also did a test spot on the walls to see how the colors would look.

My janitor (the same one we went geocaching with) came and saw what we were doing and suggested we talk to the paint crew that was on campus - although they were busy painting the outside of all the buildings, they were looking for inside work to do when the rain came. So, I talked with the supervisor, showed him what I was planning, and he said they'd have it done in about a week.
I stopped by a few days later to drop off some stuff and was told that the tan color we had picked up turned out to be two different tans. They had already cut in with the darker tan, so there was no way to mix the two to create the same color. The other dilemma? There wasn't enough of the blue paint to do the back wall. So back to Lowe's I went and picked up a gallon of tan paint. I picked out a color swatch that was slightly darker than the tans that were already on the wall to make sure it covered well. I picked out Faint Maple, again by Valspar. Twenty-eight dollars later, we had all the paint needed to finish the room. I also was able to talk the crew into painting my classroom door black using paint they already had on hand.
I am so happy with the new color! It makes the classroom so much more inviting. No more sterile white. Anyways... back to the tour! This is the view you see when you first walk in:

You'll notice that I finally got that extra white board installed last year. I used it mainly for assignments, homework, and announcements. Beside that is an extra table. Not sure what I'll do with it yet. I might let the students use it as a charging station for their phones and iPads. Above that table are 4 writing tips posters that I've had in storage for the last couple of years.

Also, the door to the mechanical closet was left open, so there is a little glimpse into a room I'm normally not allowed to go into. And my tiny TV on a cart is still hanging around. As soon as the door to the closet is shut, I plan on sticking the TV right in that corner so that it's out of the way.

I had to change out the bookshelves for my classroom library; my tall 5-shelf bookcase toppled over and fell apart when they moved it to re-wax my floors. So, the large 3-shelf one from behind my desk is now for the students to use. Flashcards, markers, crayons, pencil sharpener, stapler, globe - all there for the students to use. I also put my "Mrs. C is currently reading ________ by _________" frame (inspired by this) up there along with some subway art I printed off the internet.
The wall above and beside the library is a little blank. But, I'm hoping to fill it in with student work as the year progresses.
If you look to the left when you first walk in, you'll see this:

I took down the red/blue bulletin boards and replaced them with something a lot more simple to go with the new paint colors. I bought a roll of bulletin board paper and three packs of brown border from a teaching supply store near Altamonte Springs.
Also, I've arranged the student desks into groups of two this year. I'm hoping to incorporate a lot more collaboration into my lesson plans, so this seating arrangement will help with that.
My desk is in the same location as it was last year (Hubby not included). Just did a little rearranging of where the computer sits. By having it closer to the wall, it allows me to see more of the classroom from where I'm sitting. Plus, it gives me the larger desk to spread out everything I'm working on.

Remember that 5-shelf bookcase that toppled over? Well, my janitor was able to save part of it. So, I moved that behind my desk to hold all of my binders and teaching resources. It also gives me a place to display some family photos. You'll notice that I hung up my college diplomas. Its my first time using 3M strips to hang anything, so we'll see if the frames are still up on the wall when I go back next week. Fingers crossed!

I also brought our small filing cabinet from home and set it up behind my desk. Its the perfect spot for my document camera. Eventually, I'm hoping to move some of my more frequently used files into those drawers.
To the right of my bookshelf is the door to my storage closet. I snapped a couple of photos to share, so here's a quick look inside of there:


It holds resource books for the textbooks I'm currently working with along with the resources from our previous textbook adoption. I keep extra school supplies and old student projects back there too. My microwave and fridge (both gifts from my folks) are back there along with my large filing cabinet and all of my movies.
Looking towards the back of the room:
The bulletin board is for hanging student work. The baskets on the table are for returning student work. On the wall are baskets that I keep magazines in along with my emergency evacuation folder (which holds our evacuation route along with a roster for each of my classes). The white board is used to announce upcoming events and tape up flyers.

To the right are the windows, a/c unit and painted wall map. In the window is a poster with my name, where I went to college, and the degrees I received. It's part of a school wide effort to create a college-going culture. To help with that culture, I thought it'd be fitting to include a UCF poster below my name poster.
Keeping with the college-going culture, I decided to cover up my a/c unit by hanging up college pennants (inspiration here and here). I had three already in my storage closet. I picked up two more on our recent trip to Savannah and added a UF pennant (which nearly killed me to buy, by the way) after the college tour I helped chaperone this summer. All it took was a little tacky glue (left over from this project) and some magnets my mom picked up at a yard sale. I'm thinking of adding a sign to the top like this.
But my favorite part of my classroom is my map!

I realized that I never shared the whole process on how I made the map, so I'm planning on writing up a post about that soon. Anyways, even though the paint crew painted all of the walls, we asked them not to paint around the map. Dan and I touched up all of the white paint and added a border around the map to match the rest of the bulletin boards around the room.
So that's it. That's my classroom. I'm so excited that my room is already organized before the school year even starts. There's less than a week left in my summer vacation before preplanning begins. But going back with this already checked off the to-do list is amazing!
Before I go, I wanted to say a big thank you to Dan for spending his days off with me getting my classroom organized! He helped me do the things that I'm too short to do and got my computer all hooked up and ready to go. That, and he kept me sane through the whole process, which isn't always an easy task. Love you hun!


I love that paint color! Your classroom looks great. Thanks so much for following my blog:)
ReplyDelete